
Is it difficult to keep your vehicle in a like-new shape longer? Do you have to take it to a body shop every now and than to have it coated with a fresh paint? Not really. With a regular care you can keep even a very old car looking shiny like new. This 15-year-old Mercedes-Benz with 170K miles saw many hot summers and cold winters with salt on the road. Yet, it has never been repainted, this is still its original paint. Looks nice, isn't it? So, how to keep your car in a good shape? Is it time consuming? Not really. The secret is to wash your car regularly, wax it once in a while and take care of minor scratches and chips timely. Rust proofing will definitely help if use of road salt is common where you live during winter months.
• Wax your car at least once or twice a year
• How to use tire shine
• Why you need to rust proof your vehicle
• Keep the touch-up paint in your car
• Repair stone chips and scratches before they start to rust
• How to touch up minor scuffs
• How to repair larger scuffs with a touch-up pen
• How to touch-up stone chips
• How to remove paint marks left by other objects
• How to remove minor scratches
• How to polish foggy headlights
Wash your car regularly

Wash your car regularly. Bird droppings, dead bugs, or limestone dripping from the basement parking will cause damage to the paint if not washed off in time.
In winter time, the road salt can damage the alloy wheels finish and cause rust spots on the body panels if left for a long period of time. In addition, a last stage in most car washes includes spraying your car with some sort of a protectant, such as wax that will help preserve paint finish from rust. |

Regularly clean off the dirt and sand from under the wiper blades. Sand that gets caught under the wiper blades can over time cause scratches on your windshield.
|

Clean the leaves and other debris from the areas below the windshield (cowl panel), as the leaves block water drains and collect the moisture, causing a damp smell inside your car.
|
Wax your car at least once or twice a year

A car wax makes your car shiny and protects the paint. It also covers minor scratches and stone chips slowing down the corrosion. If you have never waxed your car before, it's very easy and takes only about half an hour. Plus, it's a good workout! Read more here: How to wax a car. A good-quality car wax will stay on the car for several months. When shopping for a car wax, opt for premium-quality products. A $25 bottle of a good car wax product will be enough to wax your car for a few years.
|
Tire shine

If you want your wheels appear black and shiny, apply some tire shine. Just spray the tires and wipe off the excess.
|
Consider rust proofing your vehicle

If you live near the coast or where the salt use is common in winter months, consider rust-proofing your vehicle. This rusty part in the photo is one of the components of the brake system located underneath the car. This vehicle is only seven years old, but it has seen many winters with salty roads. Eventually, this part will fail.
|

Properly done rust proofing can protect important components of the car from corrosion. It's better to have your vehicle rust proofed before the rust starts to appear. Rust proofing can be done for $200-$400, but avoid companies where the process involves drilling holes in your car. Make sure, the bottom parts of the doors and trunk lid are rust proofed well.
|
Keep the touch-up paint in your car

If you don't have one yet, it's a good idea to buy a touch-up paint. You can purchase it from your dealer, order online or find in the automotive section of your local department store. Typically, a touch-up paint comes as a double-sided pen, with a base paint on one end and a clear coat on the other.
|

To buy a touch-up paint you need to know your car's color code which you can typically find on the manufacturer label. "C/TR" means Color/Trim, this car's color code is 8R5. In this car, the manufacturer label is located on the driver's door jamb.
|

The color code on the touch-up paint should match the code.
|
Repair stone chips and scratches before they start to rust

Stone chips, scratches and dings are a common problem. When the paint surface is damaged and the bare metal is exposed, it starts to rust. That's why it's important to touch-up stone chips and scratches before the corrosion process starts. It's fairly easy; see instructions below.
|
How to touch up minor scuffs
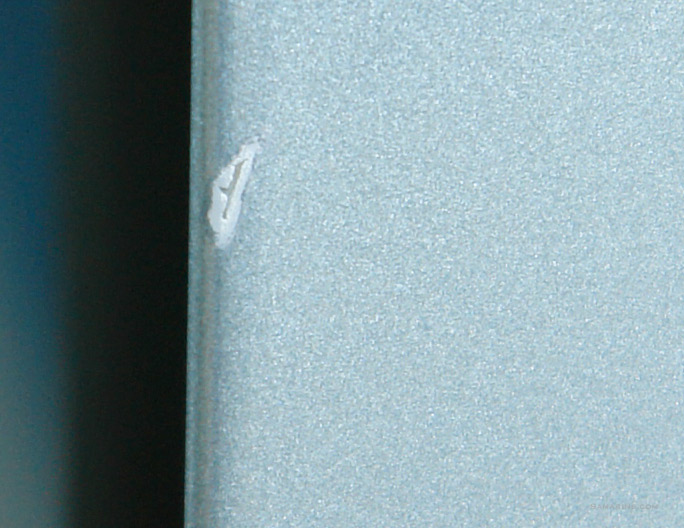
Let's see how we can repair this scuff on the edge of the door. If you look closely (click to see the larger image), this damage goes all the way through the clear coat, base paint and the primer (the grey stuff) and you can see the bare metal in the middle. This scratch will get rusted if not repaired, so we are going to touch it up.
|

For this we need a car to be clean and dry, matching touch up paint, wooden toothpick, bottle cap and a clean paper towel. Park the car somewhere in the shade, because if it's too hot, the paint will dry too quickly and won't be smooth. First what we do, as it says on the touch up paint, shake it well.
|

As this touch-up pen's tip is too thick for this scratch, we squeeze a small amount of the base color paint into the bottle cap. You have to press down a few times for the paint to appear.
|

Close the pen cap so it won't dry. Deep a toothpick into the paint. We need just a small drop of paint on a toothpick.
|

Now fill up the damage very accurately without letting the paint to come out of the scuff. If you put too much paint, wipe it out right away with the clean towel and try again.
|

It's not perfect, but it looks much better now and it won't get rusted. In a half an hour, when the paint dries up, add the layer of the clear coat from the other end of the touch-up pen (Instructions are on the pen) using the same process. The clear coat seals the paint better and makes it more shiny.
|
How to repair larger scuffs with a touch-up pen

This scuff on the bumper is a bit larger and to repair it properly, the whole bumper needs to be refinished and repainted. The quote we got from the body shop was over $1000. Of course, we can try to touch it up, it won't look as good, but it's a lot cheaper.
|

Again, the car is clean and we have the matching touch-up paint pen. Shake the pen well and carefully paint the damage over. Wipe off with the clean paper towel if the paint overflows.
|

You still can see it, but it only cost $10 for a car wash and $12 for a touch-up pen. Once the paint dries up, apply the clear coat from the other end of the pen.
|
How to repair stone chips

Let's try to touch up a couple stone chips on this car. In this case, we got matching spray paint.
|

The car is clean and dry and we have all we need: the matching spray paint (ordered from the dealer) and a toothpick. Shake the spray paint can well for a few minutes, then spray small amount into the cap. You may want to wear rubber gloves and a dust mask or a respirator.
|

Pick-up a small drop of paint with a sharp wooden stick or toothpick and carefully fill up the damage without letting the paint overflow. If the paint leaks out, wipe it off right away with a clean paper towel.
|

It looks much better now.
|

Let's fill up this one too. Pick up a very small drop that will be enough to fill the stone chip without overflowing. Fill it up.
|

Now you can barely see it. If
|
How to remove paint marks left by other objects

Somebody left this mark at the grocery store parking. It looks like it was some green car's door. If you look very closely it's actually a green paint residue left on the clear coat surface. The clear coat itself seems to be damaged only slightly.
|

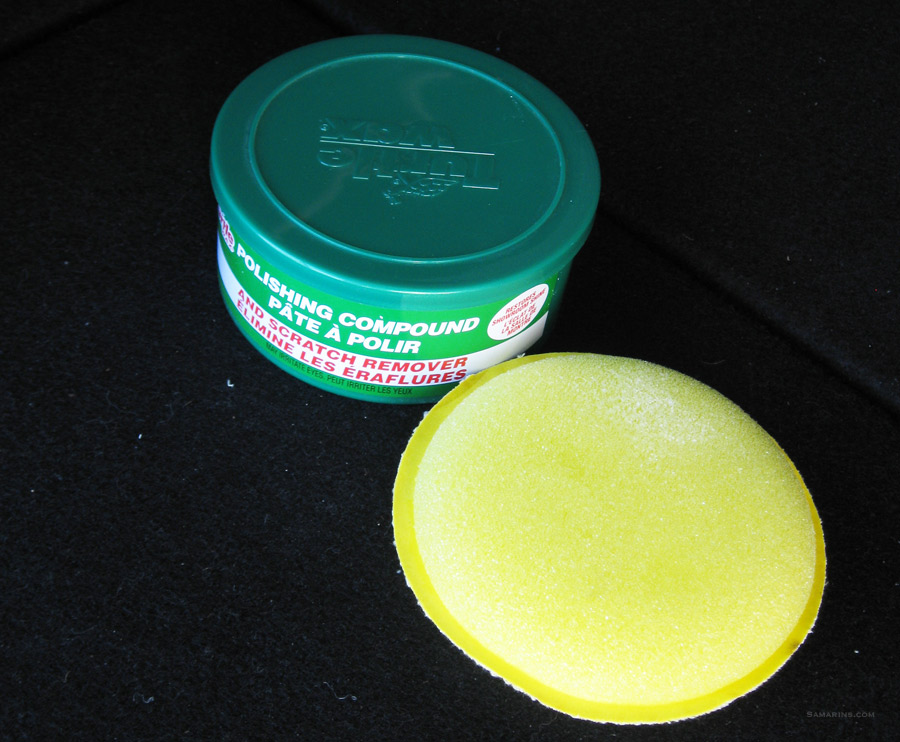
We'll try to remove this mark. All we need for this is ultra-fine 1500-grit or 2000-grit waterproof sandpaper (3000 grit is even better - the higher number stands for the finest abrasive), a polishing compound containing mild abrasive (we used Turtle Wax) and a car wax.
|

It's best to use wet sanding, meaning pour some water over sandpaper first. Very carefully (you don't want to remove the clear coat), with light pressure sand the marks with the sandpaper until the mark is gone. If you have never done it before, try on some small spot to see how it works first.
|

This is how it looks after sanding. There is no mark, but the clear coat has lost its shine. We will have to use polishing compound to make it shiny again.
|

Put a small amount of the polishing compound onto the damp sponge applicator.
|

Buff well using circular motion until the clear coat becomes shiny again.
|

Now, all that's left is a barely visible dent.
|
How to remove minor scratches

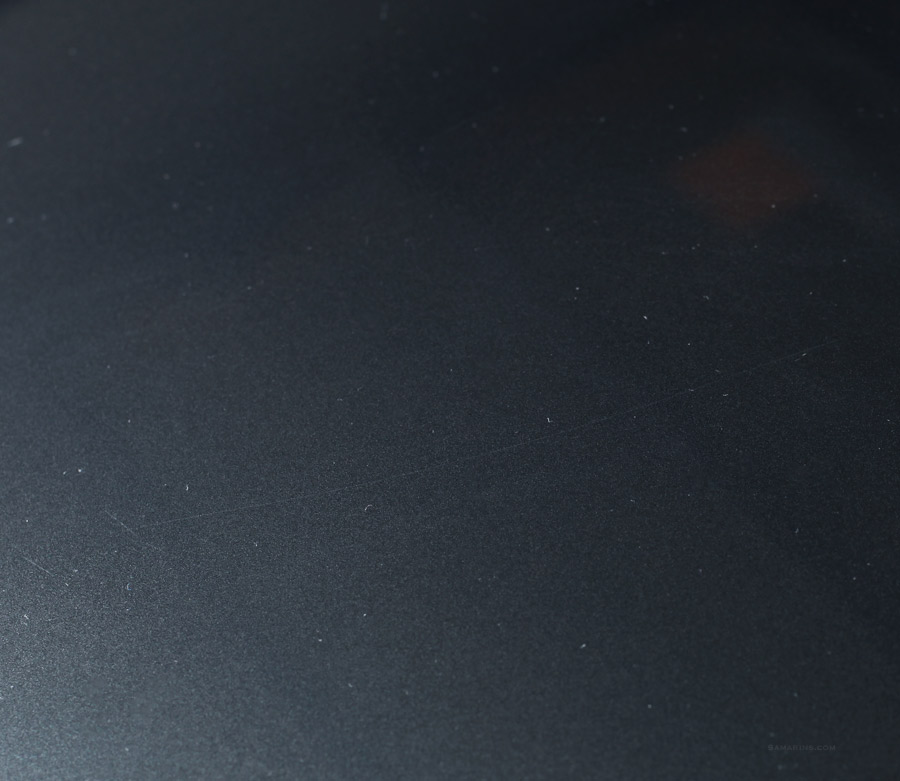
Let's try to polish out this scratch on the hood. The scratch is not very deep and looks like only the surface of the clear coat is damaged.
|
All we need is a fine polishing compound (we again use Turtle Wax) and a foam applicator. The car is clean and dry.
|

Put small amount of the fine polishing compound on the foam pad.
|

Spray some water. Buff in circular motion. Periodically check the progress. If the scratch is still visible, buff a little more. Be careful not to buff too deep, especially when buffing near the edges.
|

Once the scratch looks much better, wash the area thoroughly. Now just buff it with a regular car wax.
|
You barely can see it now. Click for a larger image.
|
How to polish foggy headlights

Over time, the headlight plastic scratches and fades. Using the same technique as described above, your can polish faded headlights, but only if they are fogged from the outside, like this one. If the headlights are fogged from the inside, not much can be done.
|
We will use the same kit as we used to buff out paint marks from the clear coat. Click for a larger photo.
|

The car is clean and dry. First, we apply a masking tape to the edges, so when we sand , we won't touch the painted panels.
|

The next step is to carefully wet-sand the headlight plastic surface with a very fine sandpaper. In this case we used a 3000-grit 3M waterproof sandpaper. Sand with water, as the water dries, spray more water. When it's wet, the sandpaper lasts longer without clogging up.
|

Now the plastic looks more clear when wet, but we need to fine-polish it. It's time to use a fine polishing compound.
|

Buff using circular motion. It takes a few minutes of good buffing to restore the shine.
|

You can see the result.
|
No comments:
Post a Comment